Starting a new business is exciting, but setting up daily operations can feel confusing.
You need to manage products, prices, billing, payments, customers, stock, purchases, suppliers, expenses, and reports. If these records are not organized from the beginning, small mistakes can become bigger problems later.
A POS system setup helps new business owners create a proper structure for sales and daily business management.
A point of sale system is not only used for creating bills. It can also help track inventory, record payments, manage customers, review reports, and keep business records in one place.
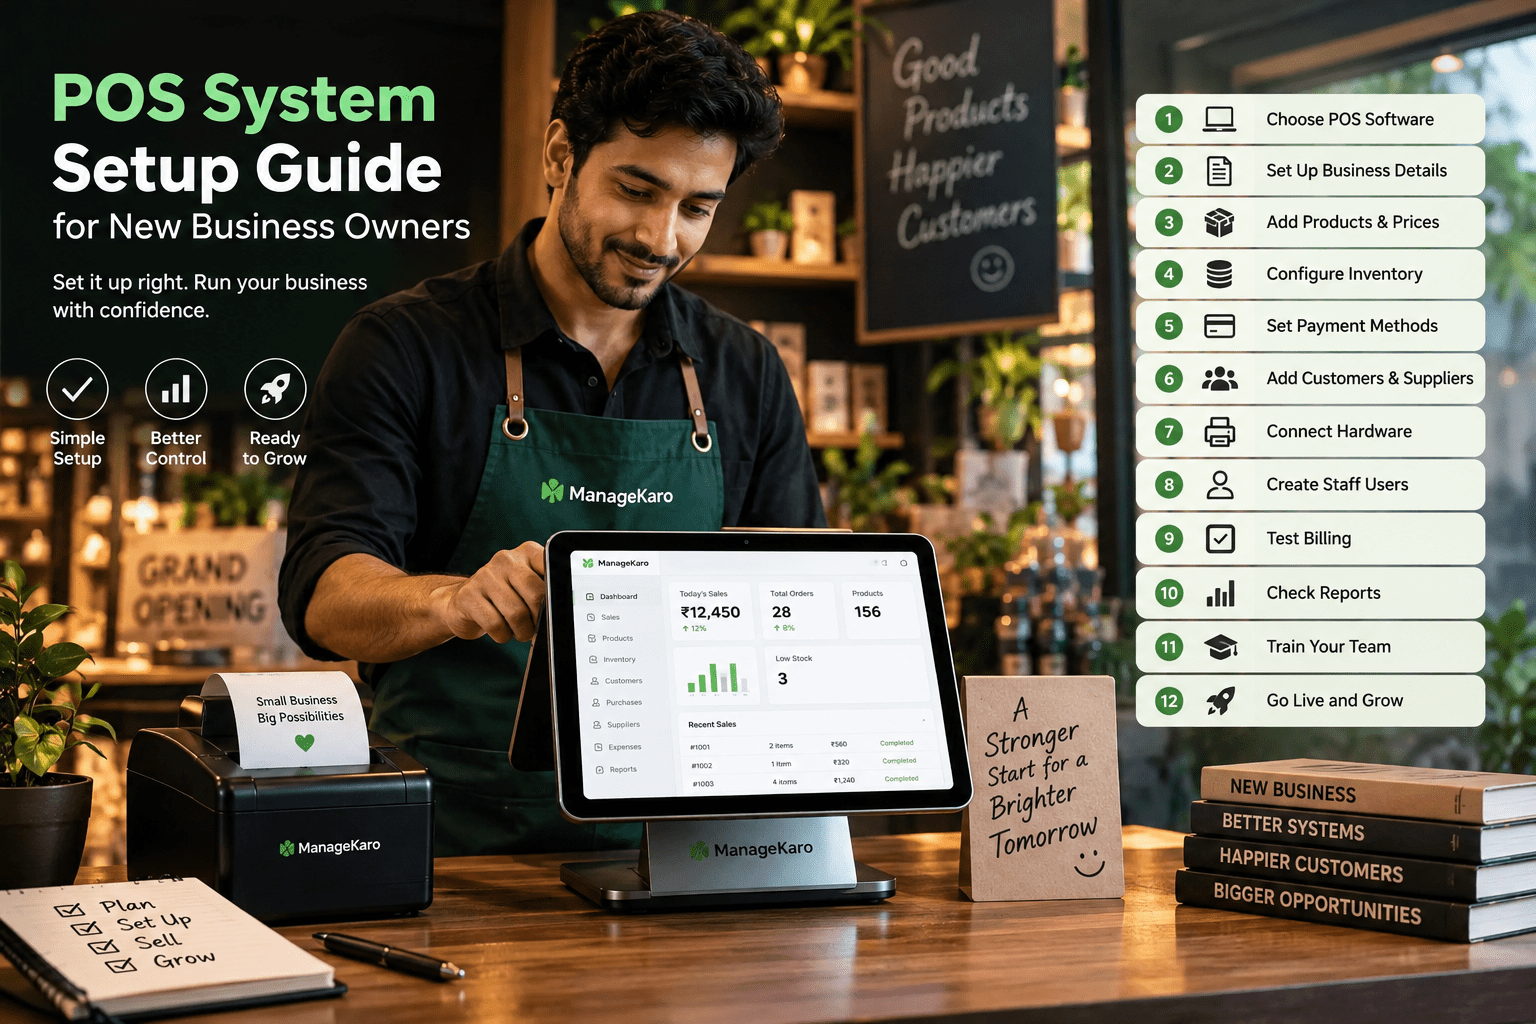
This guide explains how new business owners can set up a POS system step by step.
Quick Answer: How Do You Set Up a POS System for a New Business?
To set up a POS system for a new business, choose the right POS software, add products and prices, set up inventory, configure payment methods, connect needed hardware, create staff users, test billing, review reports, and train your team before launch.
ManageKaro helps new business owners manage POS billing together with inventory, sales, purchases, suppliers, expenses, customer balances, ledgers, and reports in one connected system.
Why POS Setup Matters for New Business Owners
Many new businesses start with manual billing, notebooks, spreadsheets, or calculators.
This may feel easy in the beginning, but it can create problems as sales increase.
Common problems include:
- Wrong product prices
- Missing sales records
- Stock mismatches
- Unclear customer balances
- Confusing purchase records
- Poor supplier tracking
- Difficult cash closing
- No clear daily reports
- Staff billing mistakes
A proper POS setup helps prevent these problems early.
Step 1: Choose the Right POS Software
Before setting up hardware or entering products, choose POS software that matches your business needs.
A good POS system should support:
- Fast billing
- Product search
- Inventory management
- Payment tracking
- Customer records
- Purchase management
- Supplier records
- Expenses
- Reports
- User roles
- Growth support
Do not choose software only because it looks modern. Choose software that supports your daily workflow.
Step 2: Decide What Hardware You Need
Not every new business needs a full hardware setup.
Some businesses can start with:
- Laptop or desktop
- POS software
- Internet connection
- Basic printer if needed
Other businesses may need:
- Barcode scanner
- Receipt printer
- Cash drawer
- Payment terminal
- Label printer
- Tablet or mobile device
https://blog.managekaro.org/point-of-sale/pos-software-vs-pos-hardware/
Buy hardware based on your real workflow, not only appearance.
Step 3: Add Business Information
After choosing your POS system, add your basic business details.
This may include:
- Business name
- Logo
- Address
- Phone number
- Tax or registration details if required
- Invoice format
- Receipt footer
- Business terms
This helps make your invoices and receipts look professional.
Step 4: Add Products and Services
Product setup is one of the most important steps.
Add clear product details such as:
- Product name
- Category
- Selling price
- Purchase price
- Stock quantity
- Product code
- Barcode
- Supplier
- Unit of measurement
Use consistent product names from the beginning. This keeps billing, inventory, and reports cleaner.
Step 5: Set Up Inventory
If your business sells products, inventory setup is essential.
Add opening stock for each product so the system knows what quantity is available when you start.
Your inventory setup should help track:
- Current stock
- Low-stock items
- Out-of-stock products
- Product movement
- Stock value
- Fast-moving products
- Slow-moving products
When inventory is set up correctly, sales and stock records become easier to manage.
Step 6: Configure Payment Methods
Customers may pay in different ways.
Set up payment options such as:
- Cash
- Card
- Bank transfer
- Digital wallet
- Partial payment
- Credit sale
Clear payment tracking makes daily cash closing easier and helps owners understand collections.
Step 7: Add Customer Records
New businesses should organize customer records early, especially if they expect repeat customers.
Customer records may include:
- Customer name
- Contact number
- Address
- Purchase history
- Payment activity
- Outstanding balance
- Customer ledger
This is useful for businesses that sell on credit or manage customer accounts.
Step 8: Add Supplier Records
Suppliers are important because inventory comes from purchases.
Add supplier details such as:
- Supplier name
- Contact number
- Address
- Product supply details
- Purchase history
- Supplier balance
Supplier records help owners manage purchasing more clearly.
Step 9: Set Up Purchase Management
A good POS system should help record purchases, not only sales.
Set up purchase workflows so you can record:
- Products purchased
- Supplier name
- Purchase quantity
- Purchase price
- Purchase date
- Payment status
- Stock received
This helps keep inventory accurate from the beginning.
Step 10: Create Staff Users and Roles
If staff members will use the POS system, create separate user accounts.
For example:
- Cashier access for billing
- Manager access for reports
- Inventory access for stock updates
- Owner access for full control
User roles reduce mistakes and protect sensitive business records.
Step 11: Set Up Invoice and Receipt Format
Your invoice should be simple and clear.
Check whether your POS system allows:
- Business logo
- Product list
- Quantity
- Price
- Discount
- Payment method
- Customer details
- Invoice number
- Date and time
- Receipt footer
A professional receipt improves customer trust and record keeping.
Step 12: Test Billing Before Launch
Before using the POS with real customers, test the full billing process.
Test these actions:
- Add a product to the bill
- Scan a barcode
- Change quantity
- Apply discount
- Select payment method
- Print or share invoice
- Return or cancel a sale
- Check inventory after sale
- Review sales report
Testing helps prevent problems during busy hours.
Step 13: Check Reports
Reports are important for business owners.
Before launch, check whether reports show:
- Daily sales
- Payment summary
- Product-wise sales
- Low-stock items
- Out-of-stock products
- Purchases
- Suppliers
- Customer balances
- Expenses
- Stock value
Reports should be easy to understand and useful for decisions.
Step 14: Train Your Staff
Staff training is important for smooth POS adoption.
Train staff on:
- Creating bills
- Searching products
- Scanning barcodes
- Applying discounts
- Recording payments
- Handling returns
- Checking stock
- Printing receipts
- Closing daily sales
A simple training session can reduce many daily mistakes.
Step 15: Run a Trial Day
Before fully launching, run a trial day.
Use the POS system for test sales or limited operations.
Check:
- Are products correct?
- Are prices correct?
- Are receipts printing correctly?
- Are payments recorded properly?
- Is stock updating clearly?
- Can staff use the system easily?
- Are reports accurate?
Fix issues before the official launch.
POS Setup Checklist for New Business Owners
Use this checklist before going live:
- Choose POS software
- Add business details
- Upload logo
- Set invoice format
- Add products
- Add categories
- Add prices
- Add opening stock
- Set low-stock levels
- Add customers
- Add suppliers
- Configure payment methods
- Set staff users
- Connect hardware
- Test barcode scanner
- Test receipt printer
- Test billing
- Test returns
- Check reports
- Train staff
- Run trial day
A proper setup helps your business start with stronger control.
How ManageKaro Helps With POS Setup
ManageKaro helps new business owners set up and manage daily operations from one connected system.
With ManageKaro, businesses can manage:
- POS billing
- Sales records
- Inventory
- Product records
- Purchases
- Suppliers
- Expenses
- Customer balances
- Ledgers
- Reports
- Low-stock items
- Out-of-stock products
This helps new business owners avoid scattered records and start with better organization from day one.
Instead of using separate tools for billing, inventory, suppliers, customers, expenses, and reports, ManageKaro gives businesses a connected system for daily management.
Common POS Setup Mistakes to Avoid
Adding Products Without Categories
Categories help keep product records and reports organized.
Forgetting Opening Stock
If opening stock is missing, inventory reports will not be useful.
Using Different Product Names
Use consistent product names to avoid confusion.
Giving All Staff Full Access
Use user roles to protect business records.
Not Testing Before Launch
Always test billing, payments, inventory, and reports before real customer use.
Ignoring Support and Training
Setup help and staff training can prevent daily issues.
Final Thoughts
A POS system setup is one of the first important steps for a new business.
The right setup helps business owners manage billing, inventory, payments, customers, purchases, suppliers, expenses, staff access, and reports more clearly.
New business owners should not wait until operations become messy. They should organize sales and stock from the beginning.
ManageKaro helps new business owners manage POS billing together with inventory, sales, purchases, suppliers, expenses, customer balances, ledgers, and reports in one connected system, making it easier to start and grow with better control.
Frequently Asked Questions
How do I set up a POS system for a new business?
To set up a POS system, choose POS software, add business details, enter products, set opening stock, configure payments, add customers and suppliers, create staff users, connect hardware, test billing, and train your team.
https://blog.managekaro.org/point-of-sale/point-of-sale-system-for-small-business/
What hardware do I need for POS setup?
Basic POS hardware may include a laptop or desktop, barcode scanner, receipt printer, cash drawer, payment terminal, tablet, or label printer, depending on your business needs.
Do I need inventory setup before using POS?
Yes, product-based businesses should set up inventory before using POS so stock quantities, low-stock items, and product movement can be tracked properly.
Why should staff have separate POS users?
Separate POS users help owners track activity, control access, reduce mistakes, and protect sensitive business records.
How can ManageKaro help new business owners?
ManageKaro helps new business owners manage POS billing, inventory, sales, purchases, suppliers, expenses, customer balances, ledgers, and reports in one connected system.